# WebDAV
WebDAV is one of many standard protocols for accessing the Cloud from your desktop or another computer.
ExaVault is proud to support WebDAV fully.
## Connection Information
The WebDAV URL for your site is simply the https:// URL to your ExaVault domain followed by `/webdav`. Input `https://www.DOMAIN.com/webdav` anywhere you are asked for a URL.
WebDAV is only offered using https:// and an insecure (unencrypted) version is not offered.
## WebDAV Server Details
ExaVault operates a proprietary WebDAV server software that we build and maintain in-house using our full-time employees. Our server is compatible with the WebDAV standards. We regularly verify our compliance with the WebDAV standards using [Litmus](http://www.webdav.org/neon/litmus/), the official testing tool from the WebDAV organization.
## **Windows Setup Tutorial**
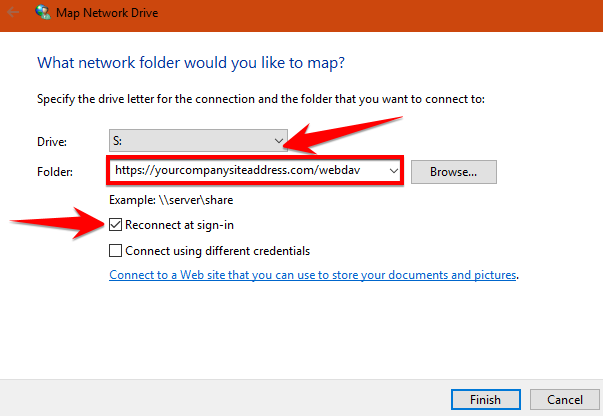
1. Open **Windows File Explorer** from the **Start** menu on your computer desktop.
2. Navigate to **Computer/This PC**.
3. Click **Map network drive** in the top menu.\
4. Select any **Drive** letter by clicking the drop down menu.
5. Type **https://YourCompanySiteAddress.com/webdav** into the **Folder** text box. Replace "YourCompanySiteAddress.com" with your FTP server address.
6. Check the checkbox next to **Reconnect at sign-in** to connect each time you log on to your computer. _(Recommended)_
7. Check the checkbox next to **Connect using different credentials** to allow different users to log in each time.
8. Click the **Finish** button.\
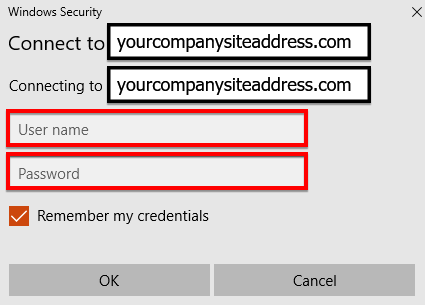
9. Connect using your account **Username** and **Password**.\
10. Click **OK**.
11. **You have now mapped a network drive on your computer using WebDAV.**
12. A new window will open showing your files and folders.
13. You can view your new network drive listed under **Network locations**.
14. You can create a desktop shortcut by right-clicking the drive and selecting **Send to...** and then **Desktop**.
## **Mac Setup Tutorial**
1. Open **Finder** from the **Dock**.
2. Select **Connect to server...** from the **Go** menu at the top (⌘K)
3. Type **https://YourCompanySiteAddress.com/webdav** into the text box.
4. Then click the **Connect** button or simply press **Return**.
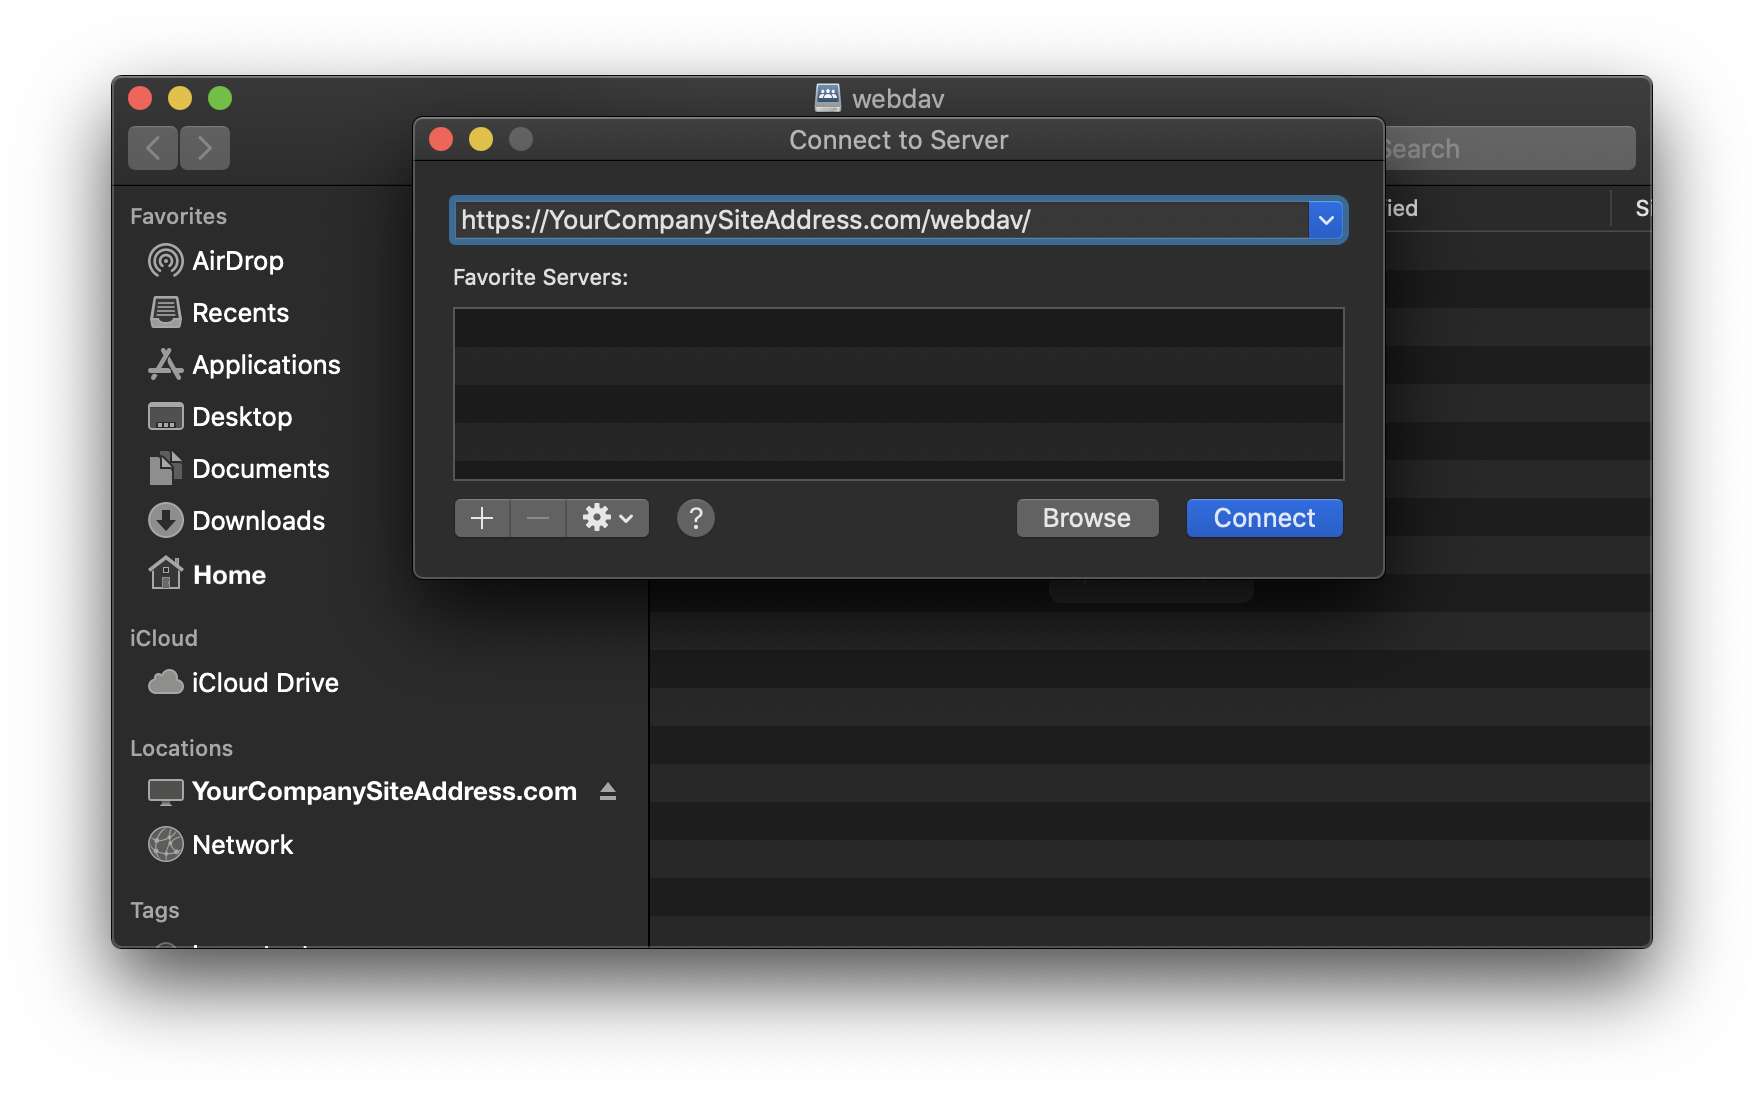\
A new tab will open showing your files and folders. You can view your new network drive listed under **Locations**.
## **Linux (GNOME) Setup Tutorial**
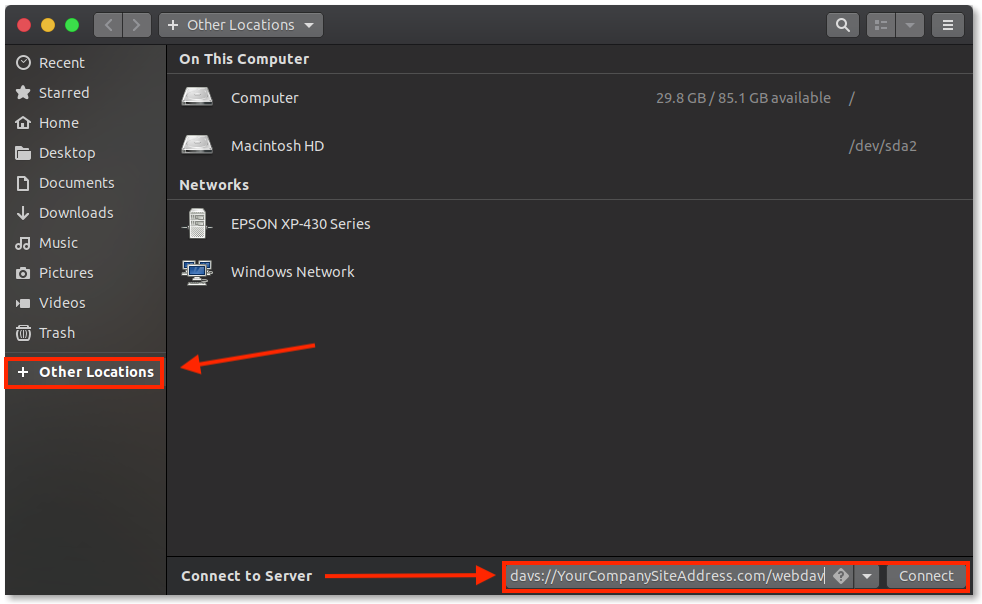
1. Open **Files/Nautilus** from the **Dock**.
2. Select **Connect to server...** from the **Places** menu at the top.
3. Select **HTTPS (WebDAV)** from the **Type** drop-down box.
4. Type **davs://YourCompanySiteAddress.com/webdav** into the **Location** field.
5. Then click the **Connect** button or simply press **Enter**.\
## **Linux (KDE) Tutorial**
1. Open **Dolphin/Konqueror** from the **Dock**.
2. Select **Connect to server...** from the **Places** menu at the top.
3. Type **webdavs://YourCompanySiteAddress.com/webdav** into the **Location** field.
4. Then click the **Connect** button or simply press **Enter**.