> For the complete documentation index, see [llms.txt](https://docs.exavault.com/llms.txt). Markdown versions of documentation pages are available by appending `.md` to page URLs; this page is available as [Markdown](https://docs.exavault.com/connection-methods/webdav.md).
# WebDAV
WebDAV is a standard protocol for accessing your ExaVault account from a desktop or other computer. ExaVault supports WebDAV in full.
## Connection Information
The WebDAV URL for your site is the `https://` URL to your ExaVault domain followed by `/webdav`. Use `https://www.DOMAIN.com/webdav` anywhere a URL is requested.
WebDAV is offered over `https://` only. An unencrypted version is not offered.
## WebDAV Server Details
ExaVault operates a proprietary WebDAV server built and maintained in-house. The server is compatible with the WebDAV standards, and we regularly verify compliance using [Litmus](http://www.webdav.org/neon/litmus/), the official testing tool from the WebDAV organization.
## Windows Setup Tutorial
1. Open **Windows File Explorer** from the **Start** menu on your computer desktop.
2. Navigate to **Computer/This PC**.
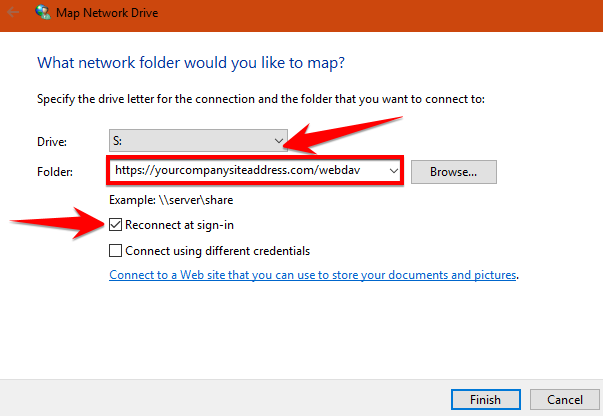
3. Click **Map network drive** in the top menu.
4. Select any **Drive** letter by clicking the drop down menu.
5. Type **** into the **Folder** text box. Replace "YourCompanySiteAddress.com" with your ExaVault domain.
6. Check the checkbox next to **Reconnect at sign-in** to connect each time you log on to your computer. *(Recommended)*
7. Check the checkbox next to **Connect using different credentials** to allow different users to log in each time.
8. Click the **Finish** button.
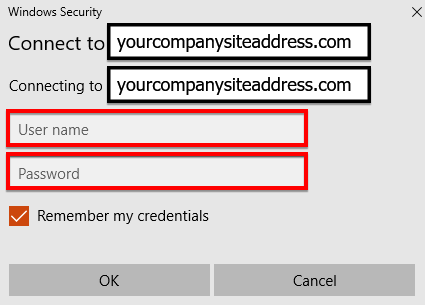
9. Connect using your account **Username** and **Password**.
10. Click **OK**.
A new window opens showing your files and folders. The network drive appears under **Network locations**. To create a desktop shortcut, right-click the drive and select **Send to...** then **Desktop**.
## Mac Setup Tutorial
1. Open **Finder** from the **Dock**.
2. Select **Connect to server...** from the **Go** menu at the top (⌘K)
3. Type **** into the text box.
4. Then click the **Connect** button or simply press **Return**.
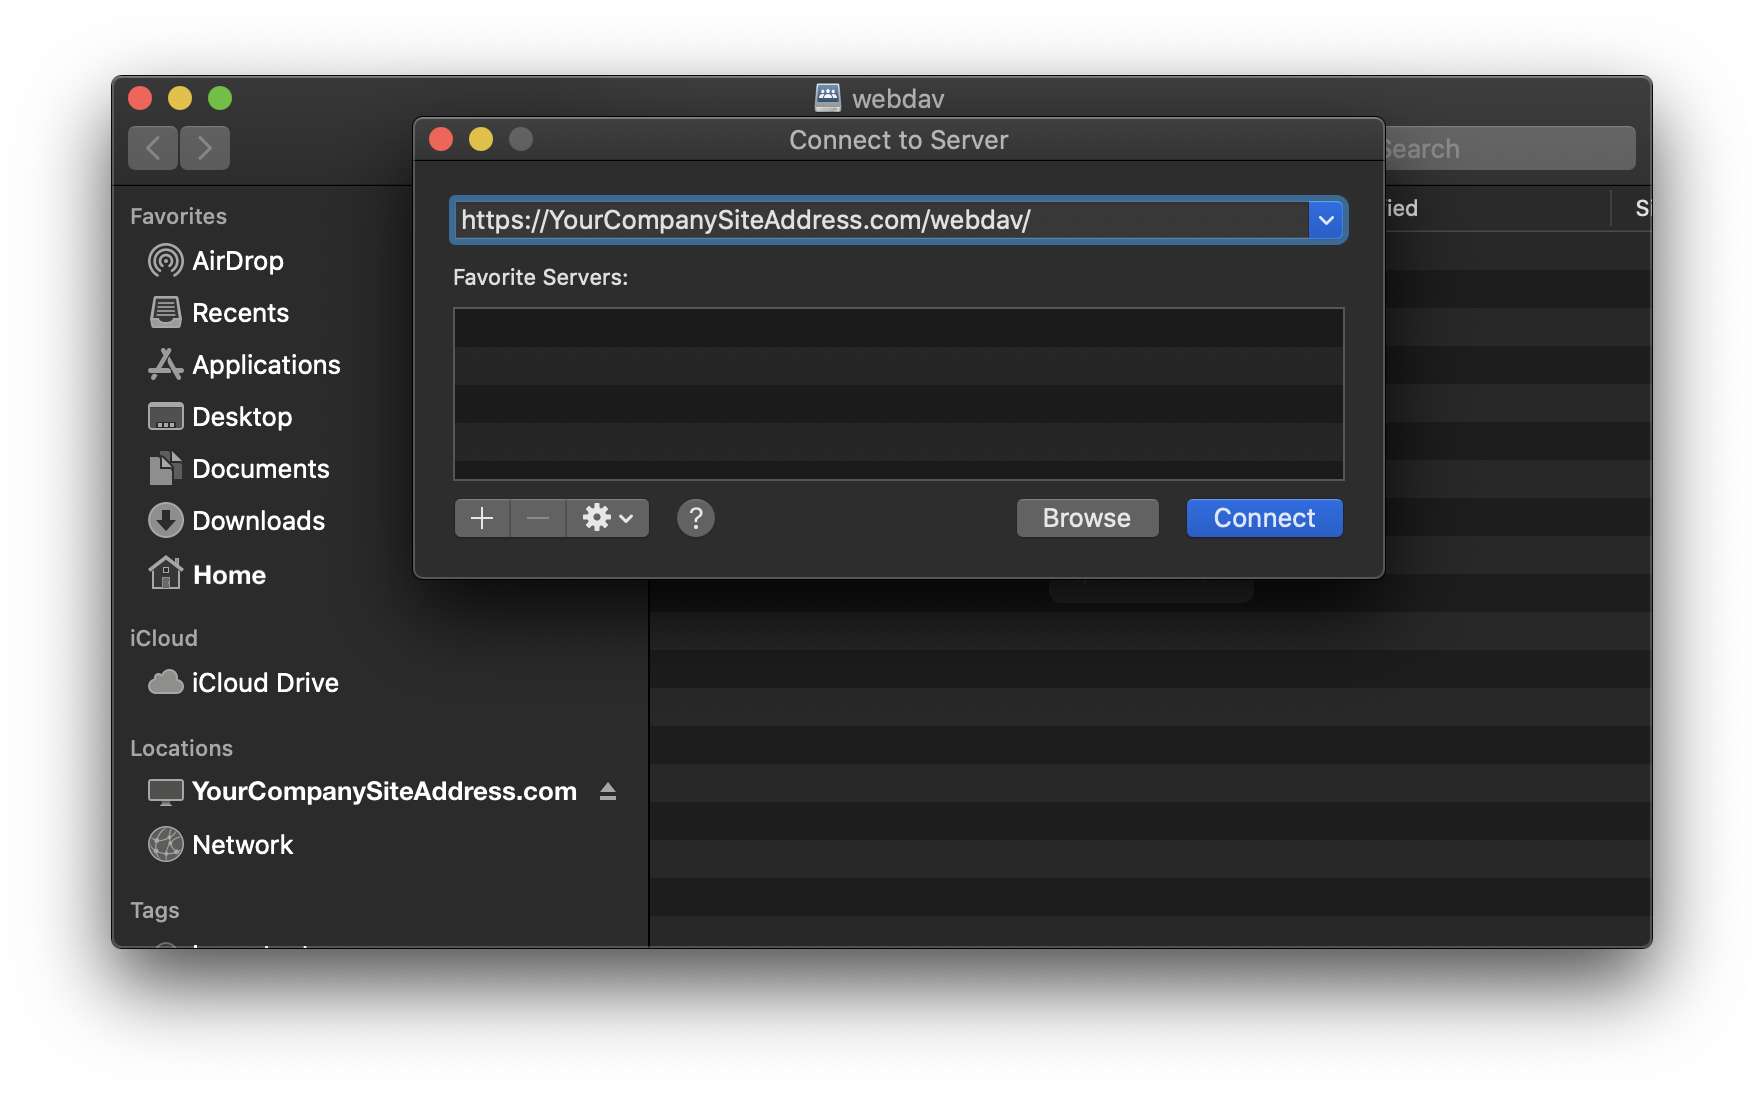
A new tab opens showing your files and folders. The network drive appears under **Locations**.
## Linux (GNOME) Setup Tutorial
1. Open **Files/Nautilus** from the **Dock**.
2. Select **Connect to server...** from the **Places** menu at the top.
3. Select **HTTPS (WebDAV)** from the **Type** drop-down box.
4. Type **davs\://YourCompanySiteAddress.com/webdav** into the **Location** field.
5. Then click the **Connect** button or simply press **Enter**.
## Linux (KDE) Tutorial
1. Open **Dolphin/Konqueror** from the **Dock**.
2. Select **Connect to server...** from the **Places** menu at the top.
3. Type **webdavs\://YourCompanySiteAddress.com/webdav** into the **Location** field.
4. Then click the **Connect** button or simply press **Enter**.
---
# Agent Instructions
This documentation is published with GitBook. GitBook is the documentation platform designed so that both humans and AI agents can read, navigate, and reason over technical content effectively. Learn more at gitbook.com.
## Querying This Documentation
If you need additional information that is not directly available in this page, you can query the documentation dynamically by asking a question.
Perform an HTTP GET request on the current page URL with the `ask` query parameter:
```
GET https://docs.exavault.com/connection-methods/webdav.md?ask=
```
The question should be specific, self-contained, and written in natural language.
The response will contain a direct answer to the question and relevant excerpts and sources from the documentation.
Use this mechanism when the answer is not explicitly present in the current page, you need clarification or additional context, or you want to retrieve related documentation sections.